Deploying a .NET Core Application to a $5 DigitalOcean droplet using Dokku

An Introduction
Hello everyone!
Cutting a long story short, I love developing software. However, I hate deploying it.
I've worked with different extremes of software deployment. One extreme involved dev testing, comitting to SVN, then telling the manager to press the magical deploy button and hope for the best (e.g. copy all the files to an FTP server and give it a restart) and hoping in the words of Bob Marley that everything is gonna be alright.
While the other opposite side of the spectrum involved using beautiful CI/CD pipelines within different environments, made available with state of the art tools such as TeamCity & Octopus Deploy which not only deploy with a single click but also run your tests for you as well!
This post is going to be about my current deployment workflow for my .NET Core projects at home. It was important for me to find a process that was not only fast, but also cheap and really simple to execute.
I wanted something that looked a lot less like a Boeing-747 dashboard.
Yes AWS, I'm looking at you.
And something that looked more like...a simple git push really.
Yes Heroku, I'm thinking of you.
I'm still planning on adding to the workflow I'll show you in the below blog post to integrate a CI/CD pipeline too. However I've not had time to consider my options or look in to this in too much detail as of yet.
For the moment though, let's focus on how to deploy your .NET Core applications to a $5 DigitalOcean droplet using Docker & Dokku! Not only giving you your very own awesome and cheap hosting of a Linux server, but also a Heroku-like deployment process that involves a simple git push to get your changes up and running in a matter of seconds!
Creating our DigitalOcean Droplet
- Sign up for a DigitalOcean account using my referral link and get $10 in free credit! If you really don't want to help me out, feel free not to though!
- Once you're in, click on the "Create" button on the top right hand side of the navbar and choose "Droplets".
- One of the amazing features of .NET Core is that it can run and therefore be deployed on a Linux operating system, so choose the latest version of Ubuntu along with the cheapest Standard Droplet with a price of $5/month.
- You might notice the "One-click apps" section. In the past, DigitalOcean used to have a .NET Core deployment option but unfortunately they removed the image after what they call a "test period" because it didn't get much usage... which I think is an unfair assessment given how young the ecosystem is, but okay. You'll also probably also notice the Dokku option but personally, I'd rather just set up my Droplet 100% from scratch.
- Choose your datacenter region, I live in the United Kingdom so I opt for London, but feel free to go with whatever choice best suits you.
- For the additional options, I tend to always go with the "Monitoring" option and choose others if I feel like I will specifically need them. For example, if I'm just temporarily deploying an MVP for a short period of time, I won't bother with enabling weekly backups. If I plan on hosting a live release, I will pay the 20% extra fee and go with the backups.
- I recommend you utilise an SSH key for your authentication. Just to clarify, this is what will allow us to authenticate our machines when we remote on to our DigitalOcean droplet, install Dokku and deploy our .NET Core application. If you're just playing around though and you don't have an SSH key set up on your machine, it is probably quicker for you to leave this for now and use the password DigitalOcean e-mail you instead when remoting on to your droplet.
- The rest of the options should be pretty self explanatory. Once the creation process commences, you are redirected back to your dashboard and you should see your new droplet listed with a moving blue bar as your droplet progresses.
Accessing our DigitalOcean Droplet (using PuTTY on Windows)
- In order to remote on to our Droplet, you will need to download and install an SSH client. I use PuTTY.
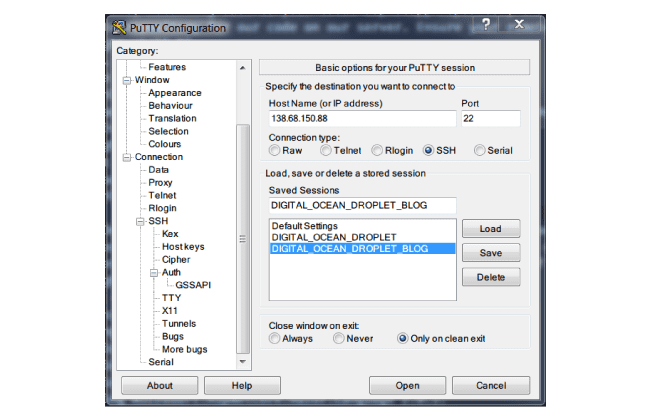
- Now that your Droplet has been created, the IP address should be displayed on your dashboard. After launching PuTTY, input your droplets IP address in to PuTTY with a port of 22. Ensure your connection type is also set as SSH.
- If you have gone with the SSH key approach, follow this step, otherwise skip to step 5. Using the category section on the left hand side, go to Connection, SSH and Auth. From there you should have an option to load your private SSH key.
- If you opted to skip the SSH key approach, go to your e-mail and you should find your Droplet's authentication username & password. Take note of these.
- Now that we are done, go back to Session on the category section on the left hand side, give your current settings a name under Saved Sessions and click Save. Now, when you launch PuTTY again in the future, you have the option to load the settings rather than have to input and configure everything again.
- We are now ready to remotely access our Droplet. You can do this by clicking Open. When asked who you are logging in as, use the username 'root' without the single quotes.
Accessing our DigitalOcean Droplet (using SSH on Mac OS)
- In order to remote on to our Droplet, you will need to use the built-in SSH client on Mac OSX that can be found in your Utilities folder.
Installing Dokku on our Droplet
1. We want to install Dokku on to our Ubuntu Droplet to give us the Heroku-like functionality we described earlier. By running Dokku on our server, we will be able to push our code changes from a local git repository up to our Droplet where our application is hosted. From there, Dokku will build everything, run our tests (we don't cover this in this tutorial) and so forth, just like you might be accustomed to from Heroku.
2. Use the below commands on your Droplet to install Dokku. This may take a few minutes.
wget https://raw.githubusercontent.com/dokku/dokku/v0.12.4/bootstrap.sh;
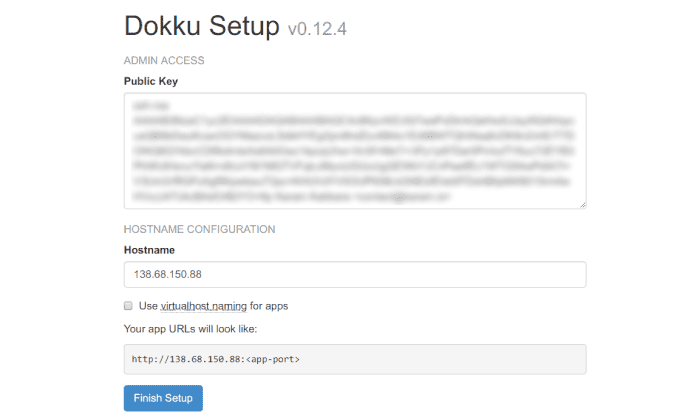
sudo DOKKU_TAG=v0.12.4 bash bootstrap.sh3. Once your installation is successful, you need to configure Dokku. Open your browser and navigate to your Droplet IP. This will launch your Dokku web installer. What you do here will depend slightly on whether or not you opted to go with the SSH key approach, but it should be self explanatory. Unless you have deviated from this tutorial and tried to set up your droplet to use your own domain name (Note: You can learn how to do this from the Dokku documentation), you should be fine to leave everything the way it is and click "Finish Setup".
Deploying our ASP .NET Core application to our Droplet
- It is crucial that our projects utilise a Dockerfile as this will immediately tell Dokku how to deploy our application. Dokku automatically realises when we commit to it a Dockerfile and has the ability to run it within a Docker container on our server for us to access.
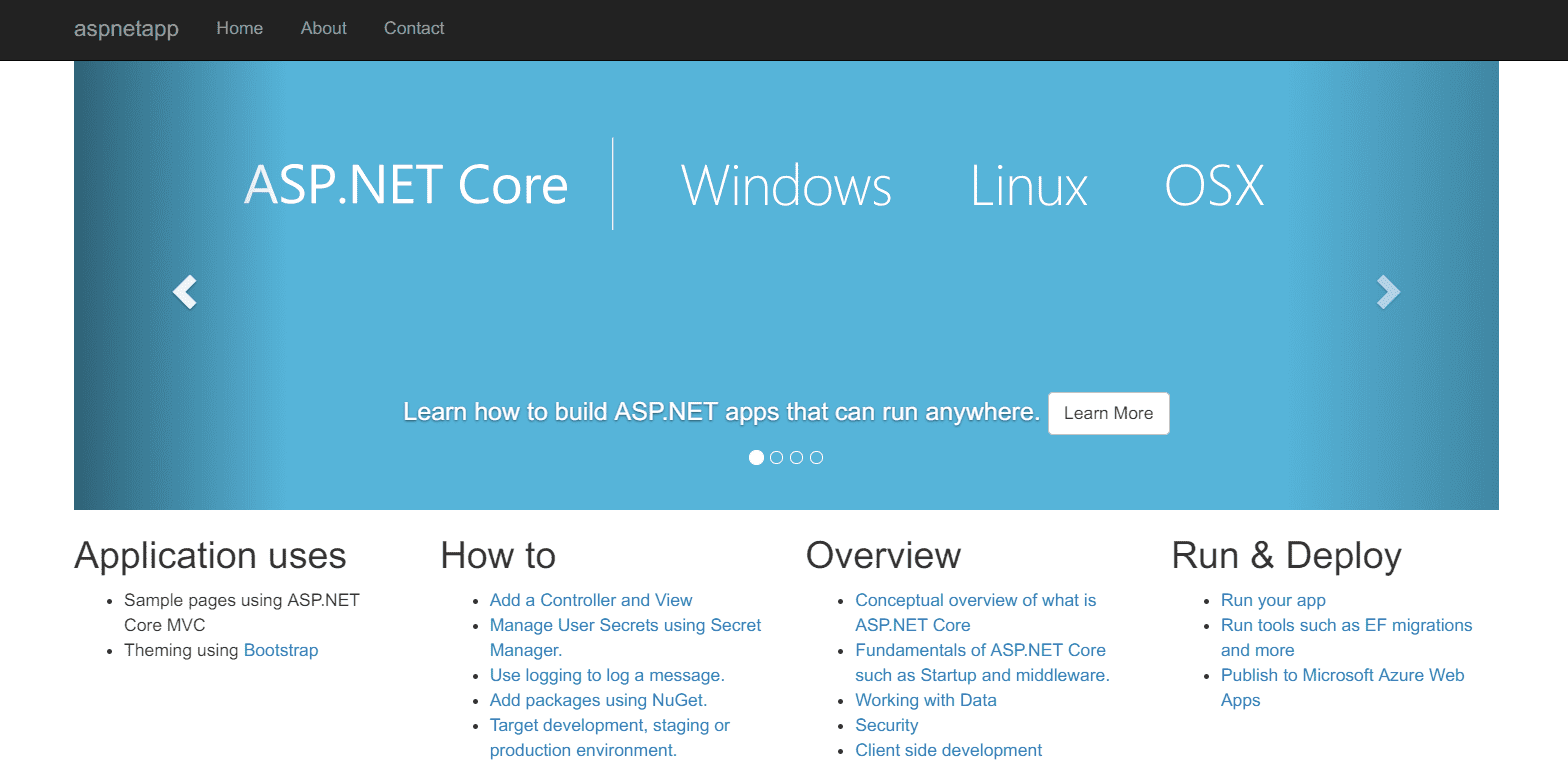
- For this example, I'll be using one of Microsoft's Official .NET Core Docker samples that can be found here. Clone it down to your system using git clone in a terminal on your local machine.
- Before we get to deploying the aspnetapp repository we just pulled down to our Droplet to host, we have to make one slight modification to the dockerfile. I've pointed out the line that needs adding below. The reason we add this line is because Dokku defaults to listening to applications running on port 5000 on your Droplet. You can set different applications to different ports and so on in case you want to hose more than one application on your Droplet, but that'd be going a bit off topic for now.
FROM microsoft/dotnet:2.0-sdk AS build
WORKDIR /app

# copy csproj and restore as distinct layers
COPY *.sln .
COPY aspnetapp/*.csproj ./aspnetapp/
RUN dotnet restore

# copy everything else and build app
COPY aspnetapp/. ./aspnetapp/
WORKDIR /app/aspnetapp
RUN dotnet publish -o out /p:PublishWithAspNetCoreTargetManifest="false"

FROM microsoft/dotnet:2.0-runtime AS runtime
ENV ASPNETCORE_URLS http://*:5000 # <--- THIS LINE IS MISSING AND NEEDS ADDING!
WORKDIR /app
COPY --from=build /app/aspnetapp/out ./
ENTRYPOINT ["dotnet", "aspnetapp.dll"]
4. Now go back to your Droplet in your SSH client and run the command below. Note that you can call your Dokku application whatever you like, but I've gone with aspnetapp for the sake of consistency.
dokku apps:create aspnetapp5. Next, returning back to your local aspnetapp repository that you cloned in step 2 on your machine and set up a remote repository for our code on our server. Ensure your remote username is dokku otherwise this won't work.
git init .
git remote add aspnetapp dokku@YOUR.DROPLET.IP:aspnetapp
Now you can commit & push the repository files up to your droplet. As it is already set up with a working ASP .NET Core application and a valid dockerfile, you're good to go.
git commit -m "initial commit"
git push aspnetapp master
6. Once your deployment starts, you'll get plenty of console output from Dokku. Don't worry about it too much unless there is an error for some strange reason. You'll eventually see a point where Dokku is outputing a typical dot net restore which might look familiar to you. This is because of our dot net restore step in our dockerfile.
Step 5/13 : RUN dotnet restore
 ---> Running in fe05207b711f
  Restoring packages for /app/aspnetapp/aspnetapp.csproj...
  Installing System.Data.SqlClient 4.4.0.
  Installing Microsoft.Extensions.Caching.SqlServer 2.0.0.
  Installing Microsoft.EntityFrameworkCore.SqlServer 2.0.1.
  Installing Microsoft.AspNetCore.Razor.Language 2.0.1.
  Installing Microsoft.AspNetCore.Server.Kestrel.Core 2.0.1.
  Installing Microsoft.EntityFrameworkCore.Design 2.0.1.
  Installing Microsoft.AspNetCore.Mvc.Razor.ViewCompilation 2.0.2.
  Installing Microsoft.AspNetCore.Mvc.RazorPages 2.0.2.
  Installing Microsoft.AspNetCore.Mvc.Razor 2.0.2.
  ...
7. You'll know once your deployment is completed when Dokku displays a message as below. You can navigate to your deployment by navigating to the IP address & port in your browser.
=====> Application deployed:
       http://[YourDropletIP]:[Port]
8. That's it! You've successfully deployed a fully functional .NET Core application to a $5 DigitalOcean Droplet in minutes thanks to Dokku & its magic handling of a dockerfile! If you're already thinking ahead towards how you'd go about hosting a database and linking everything up, there's plenty of information that can be found in the Dokku documentation.
Edit: Special shout out to /r/dotnet for upvoting this article to sit top of the sub-reddit for a day!

Enjoyed this blog post? 😄
&emoji=&slug=karam&button_colour=FFDD00&font_colour=000000&font_family=Comic&outline_colour=000000&coffee_colour=ffffff)