Deploying an AdonisJS application to the cloud using AWS Elastic Beanstalk.

I've been blogging a fair bit recently about a Node.js web framework - AdonisJS - and as I approach the end of the journey for the casual side project I was working on - which can be found here (excuse the mess and lack of refactoring, but I prioritise sleep) - it was time for me to figure out how on Earth to go about deploying the darn thing.
Being Node.js based obviously left me with several potential solutions, however as the application I have built is going to be trialled internally at work, it made sense to look towards the AWS route as that is where the majority of our cloud infrastructure lives.
I needed the quickest, simplest solution I could get my hands on and unsurprisingly, that was in fact AWS's very own Elastic Beanstalk.
What is AWS and what is Elastic Beanstalk?
Let's be honest. If you've made it this far, you probably know what AWS is. As for Elastic Beanstalk, Amazon themselves describe it as an "easy-to-use service for deploying and scaling web applications and services developed with Java, .NET, PHP, Node.js, Python, Ruby, Go and Docker on familiar servers such as Apache, Nginx, Passenger and IIS".
Bingo!
How does Elastic Beanstalk work?
There are several ways one can create a deployment environment in Elastic Beanstalk that in return will become a hosted instance of an application.
The first step is to actually "give" your code to Elastic Beanstalk in some way, shape or form. The simplest way of doing this is quite simply by compressing our application in to a .zip file and then manually uploading it through the AWS Management Console website, following the on-screen instructions.
However, the method that we're going to be taking a look at in this tutorial is a slightly more sophisticated way of getting your applications deployed through the use of the AWS Elastic Beanstalk CLI instead.
Once your code has been uploaded, Elastic Beanstalk then intelligently tries to figure out what technology your project is written in and then knows how to configure & run its magic to accommodate for you from there. For example, what you'll find in this tutorial is that when the AWS Elastic Beanstalk CLI realises we're uploading a Node.js based application to be deployed, it knows how to set up an Amazon S3 storage bucket for us, security groups, auto-scaling groups, load balancing, EC2 instances, CloudWatch alarms and so on for our environment. And yes, don't worry. Most of this sounded like mumbo-jumbo to me at one point as well and probably will continue sounding like mumbo-jumbo to you until you get stuck in!
Awesome, right?
This all sounds familiar...
Yep, you've used Heroku (a Platform as a Service/PaaS) before and generally speaking - very high level - Elastic Beanstalk can be argued as AWS's answer to it. In this case, both deploy to AWS infrastructure (EC2 for example is an Infrastructure as a Service/IaaS) and any premium you pay is going towards the costs of the platform/software that is running as a layer of abstraction on top of your infrastructure, to give you your smooth, flawless, automated and intelligent deployment experience that ends with a URL that is "live" and accessible.
Heroku type PaaS solutions are ideal when your priority is to:
- Bypass the overhead of dealing with any sort of infrastructural complications and want to just get an MVP (Minimum Viable Product) deployed as soon as possible whilst also easily being able to make code changes and evolve based on user feedback as quickly as possible.
- You or your team significantly lacks Dev Ops knowledge - which is perfectly normal by the way. Dev Ops Engineers are becoming more prominent within our industry because these areas are becoming so broad and complex, Software Developers can't be expected to cram it all in as well!
- Your project has a low computational cost - such as a very small and simple application that costs pennies or pounds and therefore requires a small number of resources.
Step 1 - Installing Python, Pip and the Elastic Beanstalk Command Line Tool.
I'm not going to re-invent or re-write the wheel. Follow the instructions here.
Step 2 - Registering to AWS.
You need an AWS Account. If you don't already have one, you can register here. If you already have an AWS account and have therefore already surpassed the "Free Tier", you may be charged going forward so you might want to look in to setting up an AWS Billing Alarm just to play it safe if you're not too confident.
Step 3 - An AdonisJS application.
For the sake of simplicity, we're going to deploy the boilerplate AdonisJS application. So in order to do that, let's make sure we've got the source code on our system.
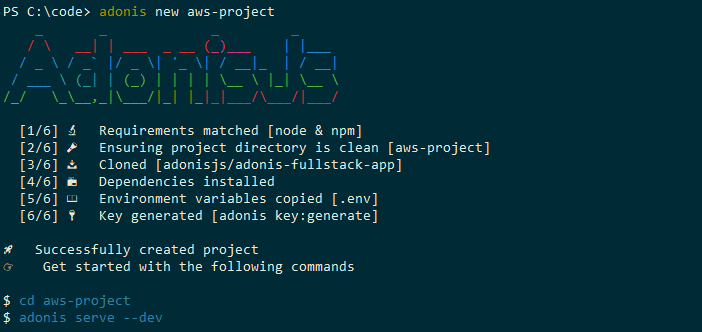
npm i -g @adonisjs/cli
adonis new *your project name*
cd *your project name*
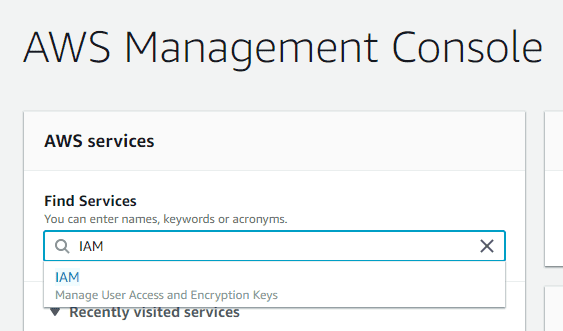
adonis serve --devStep 4 - Creating an IAM user on our AWS account.
As you've probably realised by now, Amazon's AWS documentation is scary and loves making things sound overly complicated. So to cut a long story short, IAM is basically a way for you to create, manage and set up user privileges for your AWS resources.
Upon starting the account creation process, you have to specify an account User name alongside an AWS access type. We need at least Programmatic access selected for the account that we will use to continue this tutorial.

Next you will be asked to choose or create a group. Basically, groups are groups of policies. Policies are permissions. So over time you can essentially build a group for developers made up of the AWS permissions they should have and be limited to on your AWS account, the same for DBAs and so on.
Upon defining our group, we have two options in our case. We can either do things properly and create an IAM user that only has privileges to modify our account's Elastic Beanstalk services - by attaching the AWSElasticBeanstalkFullAccess policy OR we can just create a master Administrator account that can do everything - by attaching the AdministratorAccess policy. Both will get the job done for us for the time being.
Once you have created your user, opt to download the credentials.csv file as we will require this later.
However, please bare in mind that I am no security expert. At the end of this tutorial, we terminate and teardown our deployed instance. If you're wanting to deploy something for a production environment then you probably want to actually put in more than just a couple of seconds consideration in to the IAM users set up on your AWS account. You can find more information about AWS Identity and Access Management here.
Step 5 - Deploying to Elastic Beanstalk.
If you followed the bash script in Step 3, you should already be in the root directory of your new AdonisJS application. The reason why we installed the Elastic Beanstalk CLI is because it will ask you questions and guide you through setting up your deployment.
eb initThe first step is initialising our Elastic Beanstalk settings for the application we're about to create. By following and answering the questions asked by the CLI, a ".elasticbeanstalk" folder will be created within the root folder of our application containing a generated YAML file - yep, you guessed it - defining the settings we just chose. This will obviously get used during the deployment process.
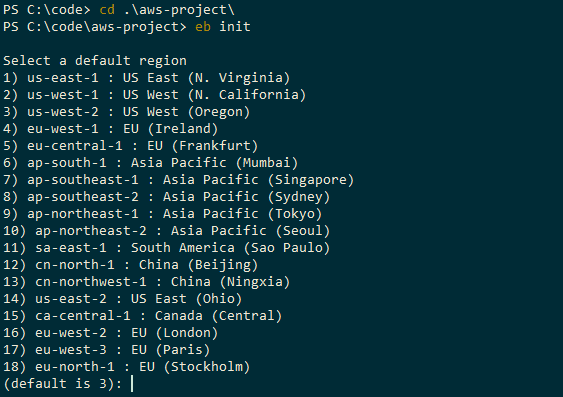
Pick your default region based on either what is closest to your geographical location or whatever suits your requirements best. Your credentials will be the access key and secret access key we downloaded in credentials.csv earlier in the previous step.
The rest should be self explanatory except perhaps the parts about setting up SSH to your instances and regarding AWS CodeCommit.
To cut a long story short, if you're unsure about an option, you probably don't need it so stick with the CLI's default. If you want more detail on AWS CodeCommit which you can read about here to help you gauge more of an understanding of whether or not you want to also use it going forwards in conjunction with your projects as your preferred method of source control.
In the scenario where you forgot to download credentials.csv you can simple re-navigate to IAM through your AWS Management Console and click on the Security credentials tab where you can Make inactive the previous access key and create a new one which will provide you with a new pair of keys.
We've initialised our Elastic Beanstalk application so now we break applications down further in to different environments. These different environments will all be handled separately by AWS as one would expect. A different set of servers, different set of load balancers, etc.
eb createWhen creating your environment, AWS suggest their standard naming convention to your via the CLI. Bare in mind that whatever you choose as your DNS CNAME prefix will become your application's live domain name such as http://{Your-chosen-name}adonis-elastic-beanstalk-dev.eu-west-2.elasticbeanstalk.com. You'll get asked some other stuff as well such as the type of load balancers you'd like, as always if in doubt go with the default option which in this case is Application Load Balancing.
In context of this tutorial, we don't really care about more than one specific environment for now.
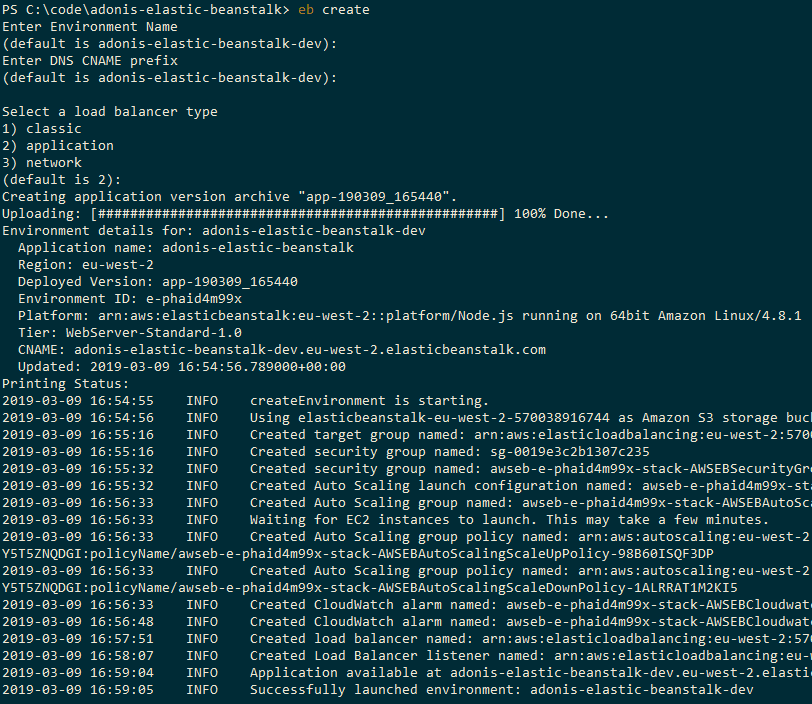
By this point, you should see the Elastic Beanstalk CLI displaying the progress of spinning up your new application environment. It'll specify things such as "Created security group, Waiting for EC2 instances to launch, Created CloudWatch alarm, etc". If so, go grab a coffee and come back in a few minutes time!
Step 6 - Welcome to the jungle!
Assuming everything went according to plan, you should now be able to access your new site using the below command or by heading to the URL kindly given to us by the CLI.
eb openYou should now see your AdonisJS web application up and running!
Step 7 - Investigating to learn!
Now that you have entered the jungle, it's time to explore. Go back to Find Services like we did earlier in Step 4 and this time search for Elastic Beanstalk. This isn't something I can tell you how to do, just get stuck in and see what you've created and try to formulate your own understanding of it all in your own head. Amazon have done a good job to keep AWS UI short, concise and straight to the point.
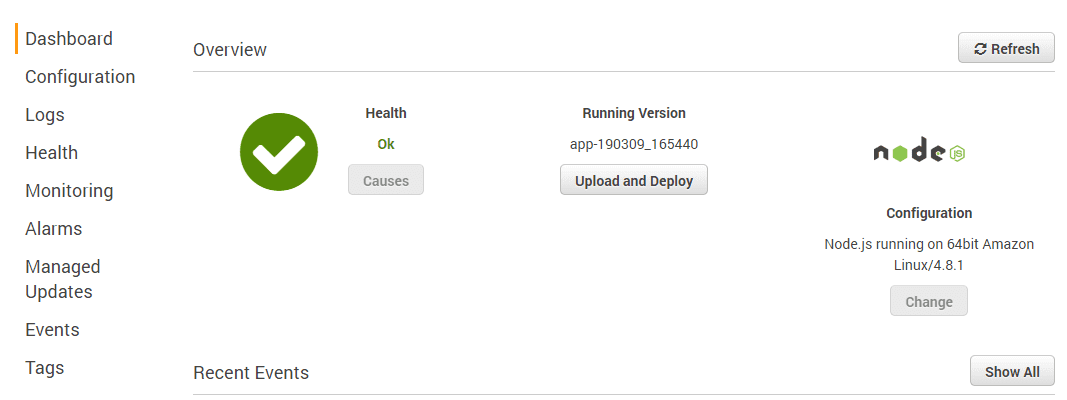
From your application's Elastic Beanstalk dashboard, you can not only see your application's health but you also have access to loads of cool monitoring, logs, alarm configuration, etc.
Step 8 - Updating the jungle!
When you've made changes to your source code and need to re-deploy, it's as easy as one, two three!
eb deployStep 9 - Destroying the jungle!
When you no longer want your Elastic Beanstalk to exist, it's as easy as one, two, three as well. The CLI is awesome.
eb terminateConclusion
That's it for now. Expect potentially a post in the near future regarding how I go about using TeamCity to deploy my GitHub stored project to AWS Elastic Beanstalk once I actually try to get my head around it.
Adios, amigos!
Enjoyed this blog post? 😄
&emoji=&slug=karam&button_colour=FFDD00&font_colour=000000&font_family=Comic&outline_colour=000000&coffee_colour=ffffff)